
Hiring a Personal Chef Can Be a Smart Investment in Your Health
Imagine opening your refrigerator in the evening after a long, busy day and finding it fully stocked with nutritious, delicious meals. Dinner is on the table quickly—without stress, the drive-thru or delivery apps. And, most important, you’re confident everyone in your family will enjoy it.
This is what weekday dinners can look like if you engage a personal chef.
Personal chefs are no longer just for celebrities or the very wealthy. Their services are surprisingly accessible and, for anyone looking to eat healthier, maybe even invaluable.
Every meal prepared by a personal chef is customized to meet your dietary goals, allergies, health concerns and taste buds. “There’s no mass production of food,” says Brianna Sebasto, owner of Brianna’s Nutrition Kitchen, a personal chef company that serves much of New Jersey and New York City. “Even with meal delivery services, you’re not getting food made specifically for you like you do with a personal chef.”
How It Works
While offerings vary, personal chefs can prepare two to five meals for as many as five people in a single visit. It usually works like this: After getting to know you a bit, the chef proposes a weekly menu. Can’t stand tomatoes? You’ll never see any. Crave roasted chicken? Expect it to make regular appearances on the menu.
Typically, about once a week the chef will shop farmers markets and grocery stores and arrive in your kitchen to prepare, package and label meals with serving and reheating instructions. The chefs even clean up, leaving the kitchen spotless. The most you’ll have to do is turn on the oven at dinnertime.
If you’re vegetarian or vegan, don’t despair! There are personal chefs who specialize in preparing meals that align with those you hire someone who has a background in nutrition and will serve you whole foods that are minimally processed,” says Lauren Kretzer, a plant-based personal chef and recipe developer in northern New Jersey. “That means fresh fruits and vegetables and whole grains, beans and seeds. Those are the building blocks of every meal I make.”
Mealtime’s Mental Load
Turning food building blocks into a meal every night can be overwhelming. The mental load causes stress and can result in poor food choices, says Marcy Ragan, owner of Relish Your Chef, which serves Monmouth County and the Shore. “Many people who come to me know they should be eating better, but they just have too much going on in other parts of their lives,” she says. “They’ve found themselves reaching for packaged foods or opting for takeout because those solutions are quick and easy.”
For a few nights a week, eliminating the stress of planning, shopping for food and preparing meals can have other health benefits, too. “The hours people spend making dinner happen can be used to do other things that support health,” says Kretzer, “like exercising or spending time with your family or even getting into bed a little earlier each night.”
Help for Health Challenges
Personal chefs can play a critical role for people who need help navigating a new medical diagnosis or food allergy. “A lot of people don’t really know where to begin if a doctor tells them they need to suddenly change their diet,” Ragan says. A personal chef, especially one with a nutrition background, can translate medically prescribed diets into meals that are not only compliant, but genuinely enjoyable to eat.
One client of Brianna’s Nutrition Kitchen shares her experience: “After my routine blood work showed elevated cholesterol, along with a few other inflammatory markers, my doctor recommended I follow a Mediterranean-style diet and cut back on processed foods,” she says. “I knew what I should be eating, but between work, my commute and taking care of my family, I just couldn’t stay consistent long enough to actually see a difference.”
Newly discovered food allergies or a diet-altering diagnosis like celiac disease can significantly complicate mealtimes. A personal chef can help ensure success. “We take cross contamination very, very seriously,” Sebasto says. “We cook in your own kitchen using your pots and your pans—we only bring in our knives—which reduces risk and can bring a level of peace and safety.”
No matter the reason, hiring a personal chef can be a great way to take ownership of your health. “We’ve been led to believe that disease is something that happens to us, and we have no say in it,” Sebasto says. “We can’t control our family genetics, of course, but we can control the foods we put into our bodies. It’s incredible when people see, ‘Oh, I changed my diet and now my cholesterol is going down, and I don’t need to take medication anymore.’ Food really does have power.”
Help for Picky Eaters
Hiring a personal chef to prepare flavorful, nutritious, kid-friendly meals can help take the stress out of mealtime with selective eaters. Not only do chefs know how to make broccoli taste delicious, but they’re full of tips and tricks to get more veggies into your child’s belly. Below are four strategies to help kids embrace a wider variety of nutritious foods.
- Ask children to help with meal prep. “Kids will be more likely to try foods they’ve been involved in preparing,” says Lauren Kretzer, a chef and recipe developer in northern New Jersey. One easy way to do this is to create assembly-line meals like tacos or grain bowls, where everyone can pick and choose which toppings they add to their dinner.
- Keep healthy fruits and vegetables visible and easy to grab. Think rinsed blueberries in an open bowl in the fridge or mini seedless peppers at kids’ eye level. “If fruits and veggies require zero effort to eat, there’s a better chance they’ll get eaten,” says Marcy Ragan, owner of Relish Your Chef.
- Make foods familiar. Research shows you might need to introduce a food up to 15 times before a child will try it. “Keep putting vegetables on the plate,” Ragan says. “The repeated exposure matters.” Kretzer agrees. “I always serve my kids veggies, even if I know for sure they’re not going to eat them,” she says. “The more often they see them, the more likely they are to eat them.”
- Eat your own veggies! “If your kids see you and your spouse eating vegetables, that’s a great place to start,” Kretzer says. “You can’t expect them to do something that you yourself aren’t doing.”
3 Easy Ways to Shake the Salt Habit
If you’ve been diagnosed with high blood pressure or are concerned about the health effects associated with diets high in sodium—increased risk of cardiovascular diseases, gastric cancer, obesity, osteoporosis and kidney disease—it usually means you need to overhaul your diet. “Many people are eating foods high in salt and don’t even know it,” says personal chef Brianna Sebasto, owner of Brianna’s Nutrition Kitchen. “There’s so much of it in the packaged foods we buy.”
Making a big change in your eating habits can be tough. Below are four tips from personal chefs to reduce the amount of sodium you consume.
- Marinate protein to infuse flavor. Marinating tenderizes proteins, helps them retain moisture during cooking and adds flavor. One easy tip from Sebasto: Marinate protein in herbs, spices and a little oil for about 30 minutes before cooking to lock in flavor without adding salt. “If your diet can handle it, add a little lemon juice or some red pepper flakes,” she says.
- Know how and when to best use salt. “If I am using salt, I’ll use just a small amount of a nice, high-quality finishing salt, added just before serving,” says Marcy Ragan, owner of Relish Your Chef. “This tends to amplify the flavors of everything with a small volume of actual sodium.”
- Use fresh herbs to add interest. “Right before you serve a dish,” says Lauren Kretzer, a plant-based personal chef and recipe developer, “add parsley, cilantro or basil—it can make a huge difference and really elevate the dish.”
Recipe: Crispy Gluten-Free Chicken Cutlets
Recipe by Brianna Sebasto of Brianna’s Nutrition Kitchen
- Serves: 4–6
- Prep Time: 20 minutes
- Cook Time: 20 minutes
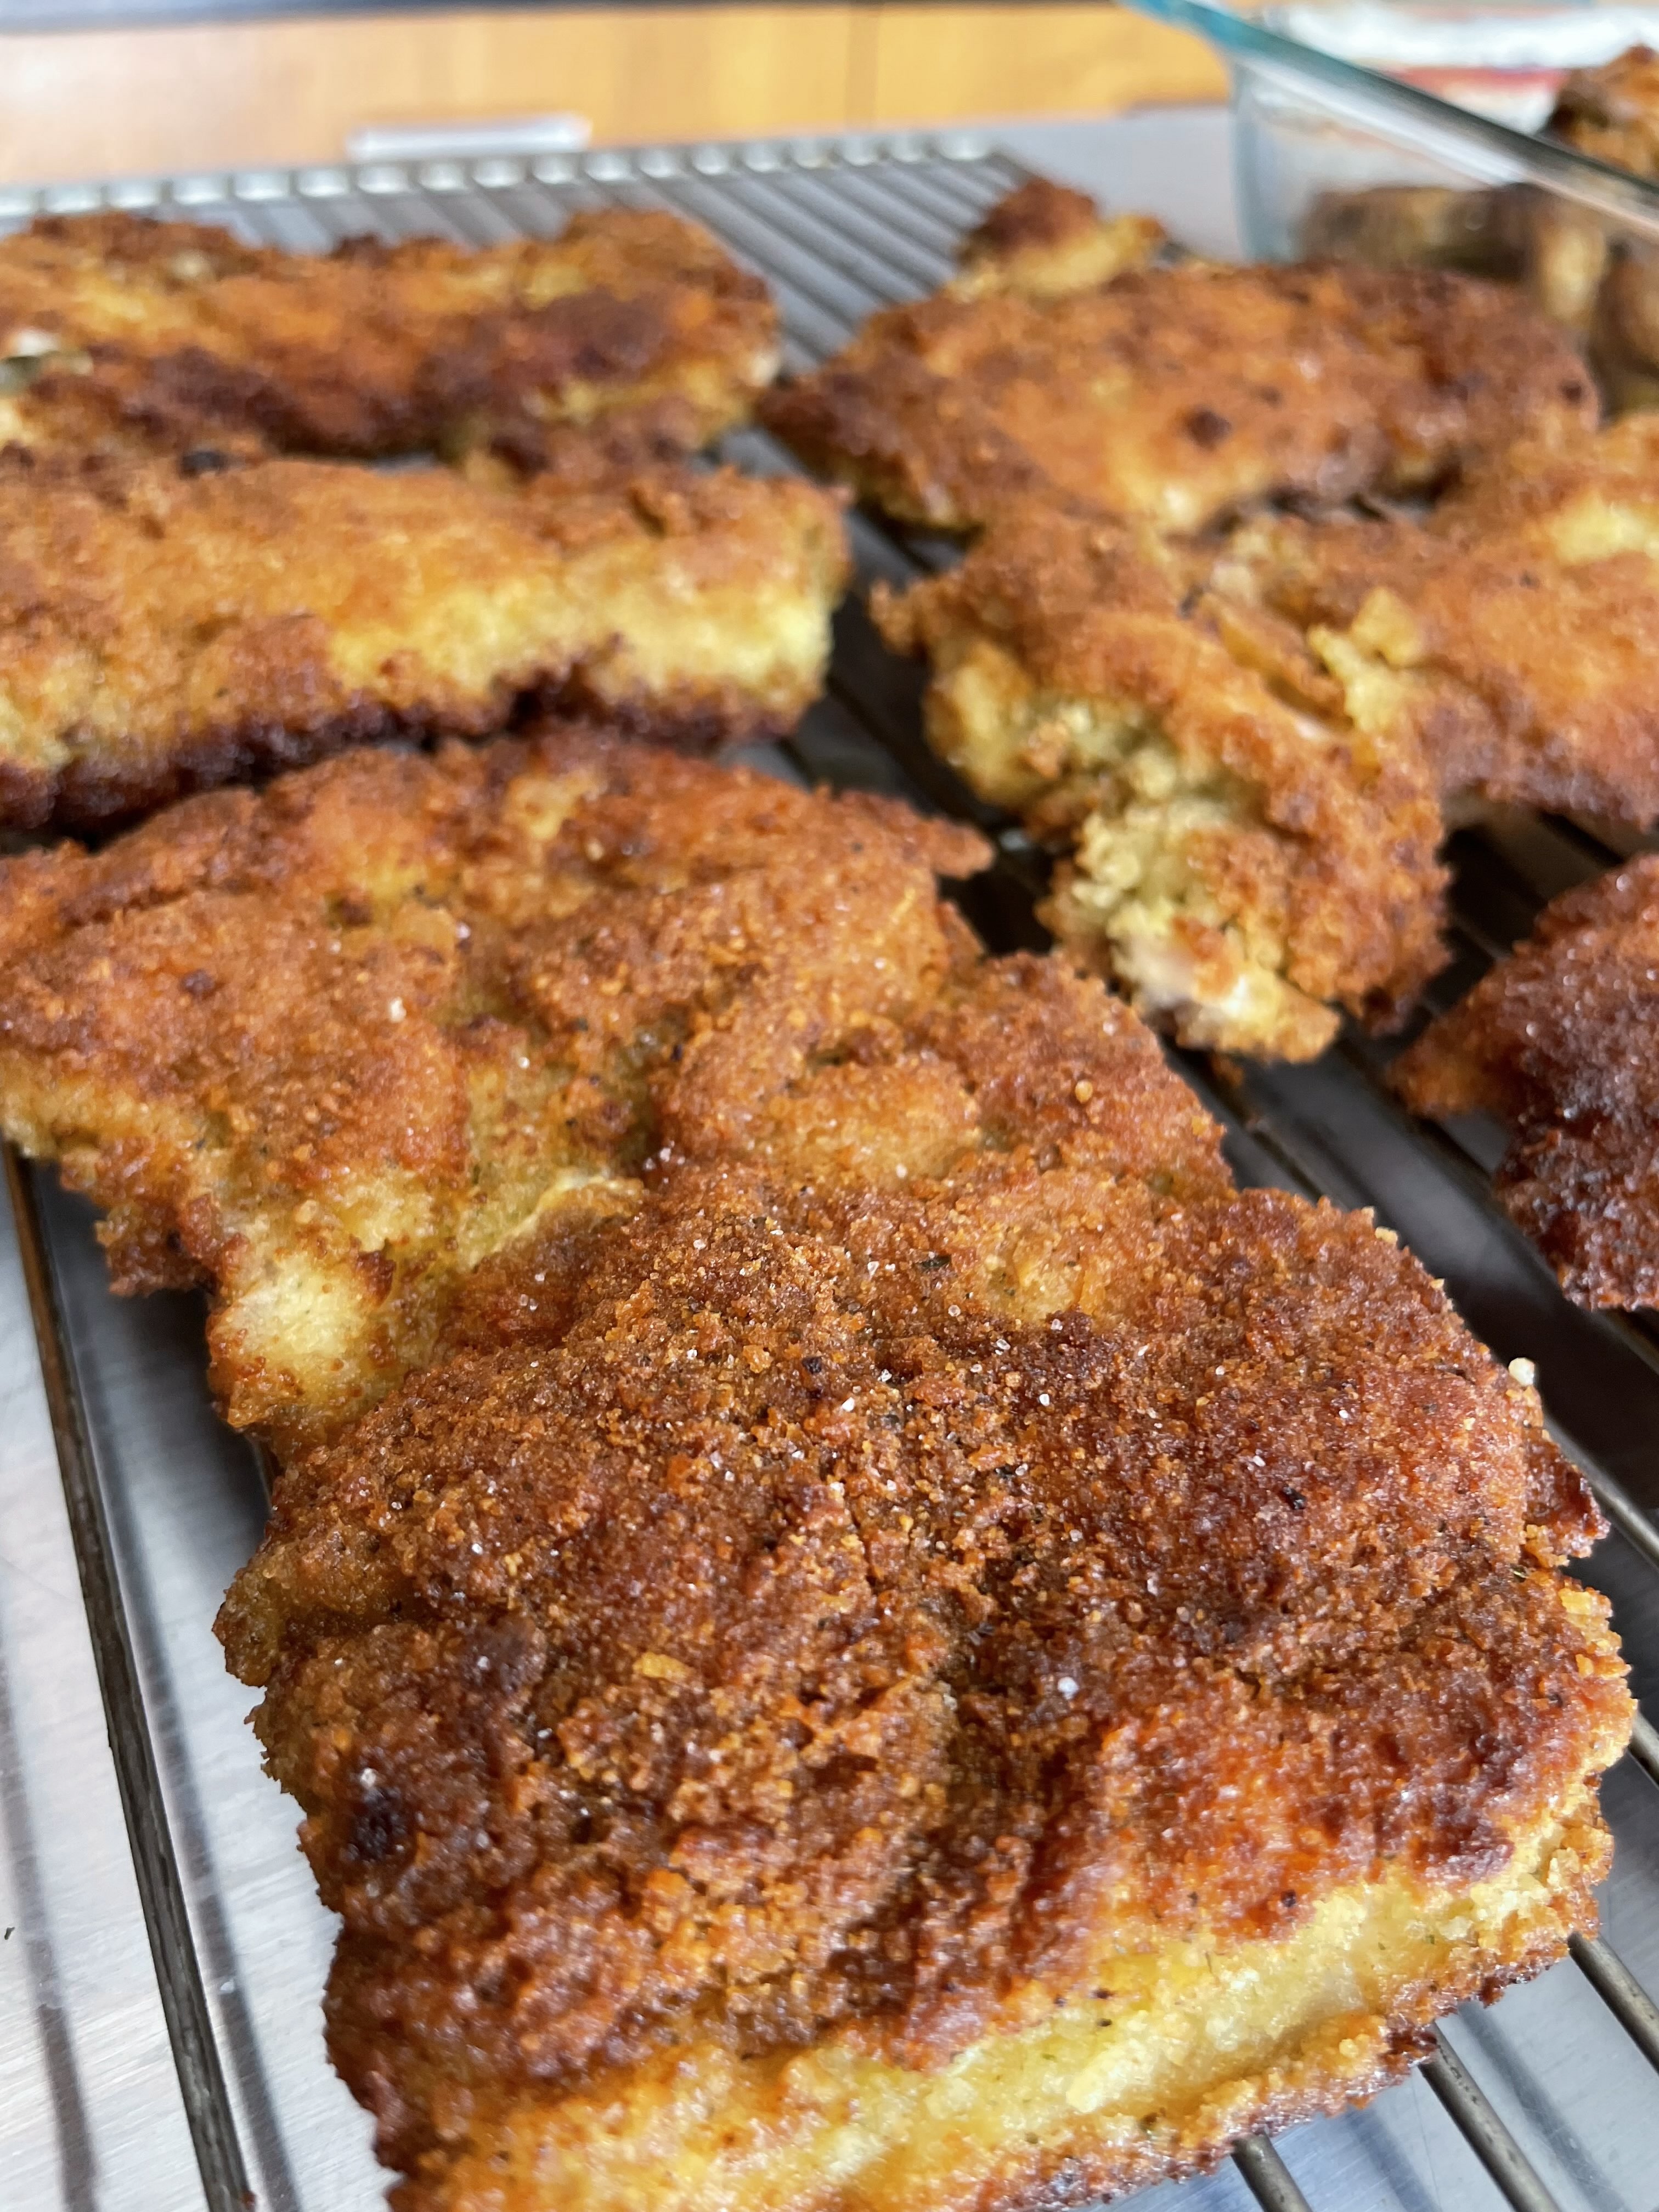
Sebasto swears by this crispy, gluten-free baked chicken cutlet, served with homemade honey mustard sauce, for getting minimally processed, whole food protein into picky eaters. Be sure to rest the chicken on a wire rack so every bite stays crunchy.
Ingredients
For the chicken:
- 4-6 boneless, skinless chicken breasts, pounded to ¼-inch thickness
- Salt and freshly ground black pepper
- 1 tsp garlic powder
- 1 tsp onion powder
For the breading:
- 1 cup gluten-free all-purpose flour (such as Bob’s Red Mill 1-to-1)
- 2 large eggs, beaten
- 2 Tbsp whole milk
- 1½ cups Aleia’s Gluten-Free Italian Bread Crumbs
- 1 tsp paprika
- 1 tsp garlic powder
- ½ tsp salt
For frying:
- Light olive oil for pan frying
- Lemon wedges for serving
Instructions
- Pound and season the chicken. Place each chicken breast between two sheets of parchment or wax paper and pound to an even ¼-inch thickness. Season both sides generously with garlic powder, onion powder and pepper.
- Bread the chicken. Line up three shallow bowls: the first with gluten-free flour, the second with the beaten eggs whisked together with the milk, and the third with the bread crumbs mixed with paprika, garlic powder and salt. Working one at a time, dredge each cutlet in flour (shake off the excess), dip it in the egg wash, then press firmly into the breadcrumb mixture on both sides. Set the breaded cutlets aside on a plate while you heat the oil.
- Fry to golden perfection. Pour enough light olive oil into your skillet to come about ¼ inch up the sides and heat over medium-high until shimmering. To test if it’s ready, drop in a pinch of breadcrumbs—they should sizzle immediately. Add the cutlets in a single layer without crowding the pan (work in batches if needed) and cook for 3-4 minutes per side, until deeply golden and cooked through to 165°F internally.
- Rest on a rack and serve. Transfer the finished cutlets to a wire rack rather than a plate—this keeps the bottom crust from steaming and going soggy. Season with a pinch of flaky salt while they’re still hot. Serve with lemon wedges and your favorite sides.
Pro Tips
- Make ahead: Bread the cutlets up to a day in advance and refrigerate uncovered on a rack. The coating dries out slightly and fries up even crispier.
- Freeze: Fully cooked cutlets freeze beautifully. Reheat in a 400°F oven on a rack for 10-12 minutes straight from frozen.
- For kids: Cut into strips before serving to make it easy for little hands to dip in ketchup, honey mustard or ranch dressing.
Recipe: Celery, Pear and Hazelnut Salad With Pear Vinaigrette
Recipe by Brianna Sebasto of Brianna’s Nutrition Kitchen
- Serves: 4–6
- Prep Time: 20–30 minutes
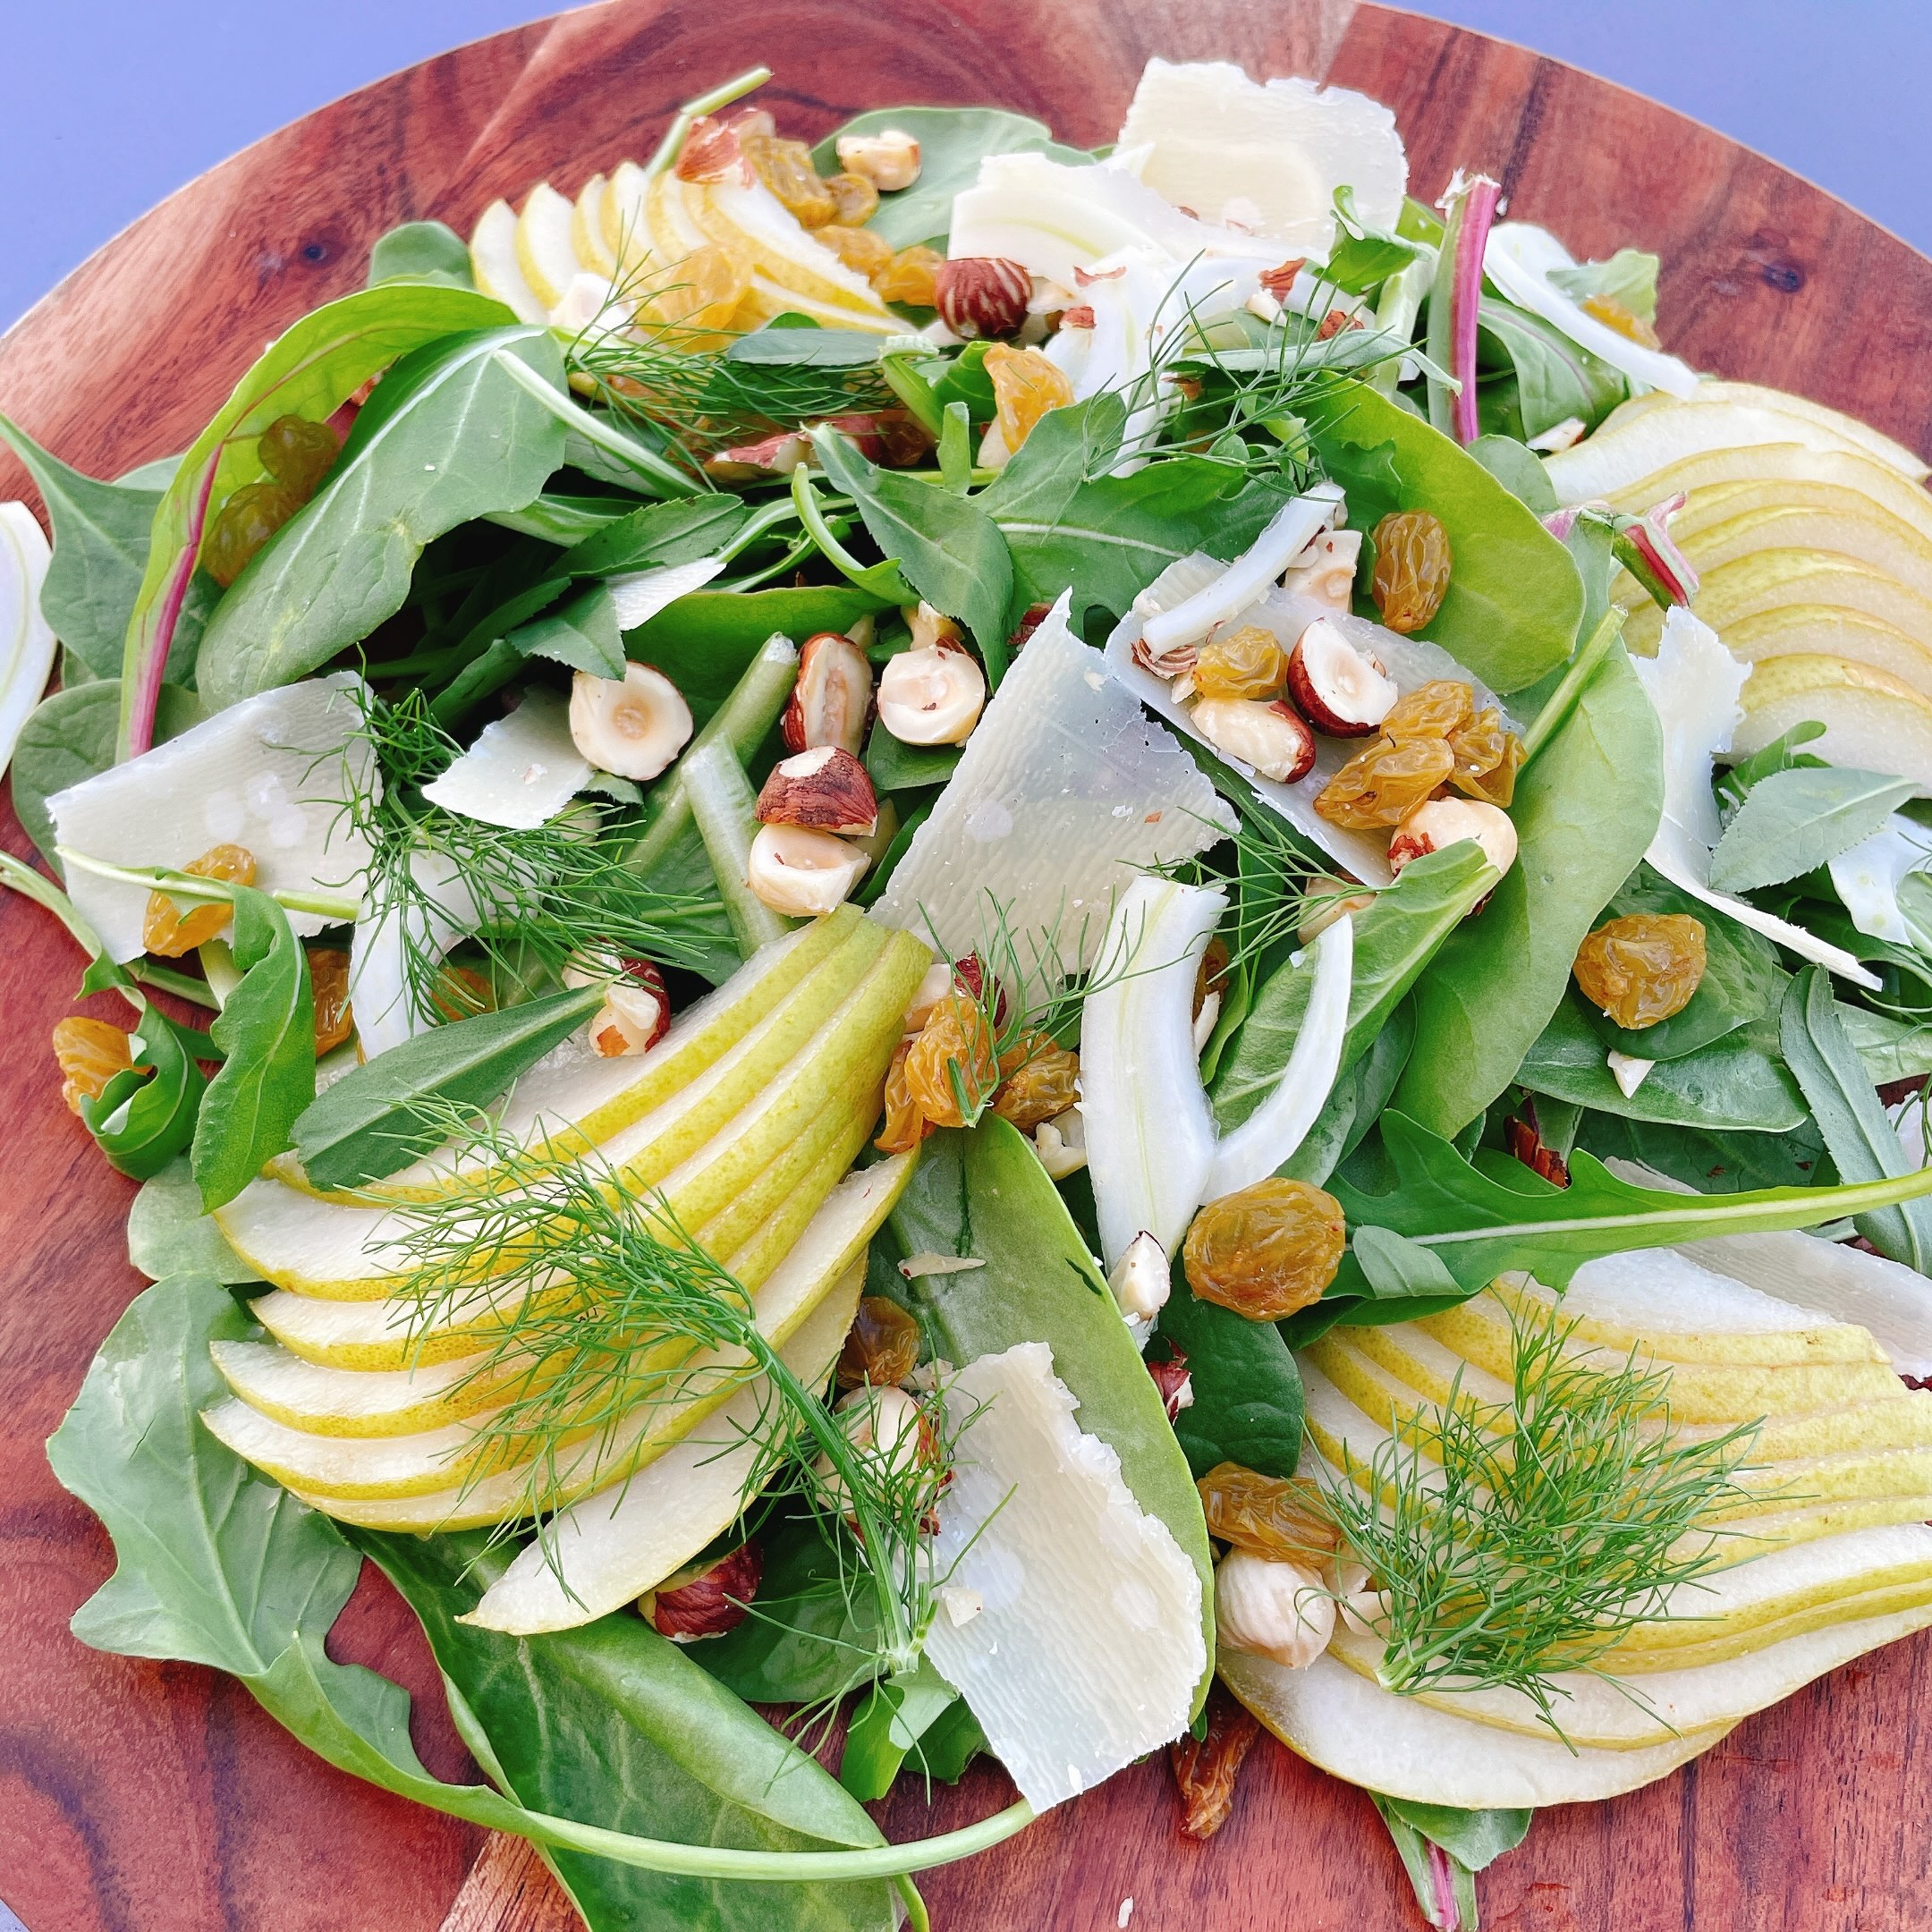
Sebasto serves this refreshing salad, which combines sweet pears, crisp greens and crunchy hazelnuts, all year round. Packed with nutrition, the pears deliver fiber and vitamin C while the arugula contains calcium to build strong bones.
Ingredients
For the pear vinaigrette:
- 1 ripe pear, cored and roughly chopped
- ½ cup olive oil
- 2 Tbsp white wine vinegar
- 1 Tbsp honey
- 1 tsp Dijon mustard
- Juice of ½ lemon
- 1 Tbsp fresh mint leaves (optional)
- Salt and freshly ground black pepper, to taste
For the salad:
- 8 celery ribs, thinly sliced on the bias
- 1 fennel bulb, shaved paper-thin (a mandoline is ideal)
- 1–2 ripe pears, thinly sliced
- 5 oz mixed greens (arugula, spinach, and radicchio work beautifully)
- ½ cup hazelnuts, toasted and roughly chopped
- ⅓ cup Parmesan, freshly shaved
- ⅓ cup dried cranberries or golden raisins
- Fennel fronds for garnish
Instructions
- Prep the salad ingredients. Start by slicing the celery on the bias and shaving the fennel as thinly as possible—a mandoline is your best friend here, but a sharp knife works, too. If you’re prepping ahead, leave the pears whole until closer to serving time, since they’ll discolor once cut. Sliced fennel stays crisp overnight in a bowl of ice water in the fridge. Once everything is ready, set it aside and move on to the dressing.
- Make the pear vinaigrette. Combine the pear, olive oil, white wine vinegar, honey, mustard and lemon juice in a blender and blitz until completely smooth. Add the fresh mint leaves and pulse just two or three times—you want them broken down but not fully blended, so the dressing stays bright and fresh. Season with salt and pepper to taste. Pour into a jar and refrigerate until ready to use.
- Assemble and dress the salad. When you’re ready to serve, arrange the greens in a large bowl or on a platter and layer the remaining ingredients on top. Drizzle with the vinaigrette and give everything a gentle toss. Planning ahead? Store the dressing separately and wait until just before serving to dress the salad so the greens stay lively. Top with fennel fronds and fanned pear slices for a beautiful finish.
Pro Tip
Toast the hazelnuts in a dry skillet over medium heat for 4–5 minutes, tossing frequently, until golden and fragrant. Wrap them in a clean kitchen towel and rub to remove the papery skins. The extra step of roasting makes a noticeable difference in flavor.